Do you dream of naturally lifted, perfectly curled lashes without reaching for mascara each morning? You’re not alone! Lash lift and lamination have taken the beauty world by storm, offering a way to get beautifully defined lashes that last. And the best part? You can achieve those professional results right in the comfort of your own home.
Performing DIY lash lift may seem intimidating, but with the right tools and a bit of patience, it’s easier than you might think. By following a few key steps and using one of the best lash lift kits on the market, you’ll be able to wake up to gorgeous, enhanced lashes every day.
How to Perform DIY Lash Lift and Lamination
Ready to start? Here’s a quick guide to performing the lash lift and lamination at home to ensure beautiful, long-lasting results:
- Prep Your Lashes: Begin by cleansing your lashes with an oil-free cleanser to remove any makeup, oil, or residue. This step is crucial, as clean lashes allow the lifting solution to work effectively.
- Choose the Right Rod Size: Each lash lift kit includes silicone rods in various sizes. The rod size determines the curl intensity. Use smaller rods for a more dramatic curl and larger ones for a natural, subtle one.
- Apply the Glue and Position the Lashes: Carefully apply a thin layer of the glue along the rod and press it against your lash line. Using a lash tool, brush your lashes upward onto the rod, making sure they’re separated properly.
- Apply the Lifting Formulas: Follow the instructions in your kit for applying the lifting solutions, using the recommended timing. Usually, the lifting products stay on for around 8–12 minutes, followed by a neutralizer for another few minutes. Precision and timing are key, so set a timer and avoid exceeding the suggested times.
- Apply the Conditioner: Some kits include a keratin conditioner to nourish and strengthen the lashes. Apply this after the lift process for a healthy, glossy finish.
- Avoid Moisture for 24 Hours: Once you’ve completed the DIY lash lift, keep your lashes dry for 24 hours. Avoid steam, sweat, and eye makeup to allow the lift to set fully.
The Ultimate Ranking of DIY Lash Lift and Lamination Kits
After thorough testing, here are the top lash lift kits you can use at home, starting with my absolute favorite:
1. Nanolash Lash Lift Kit
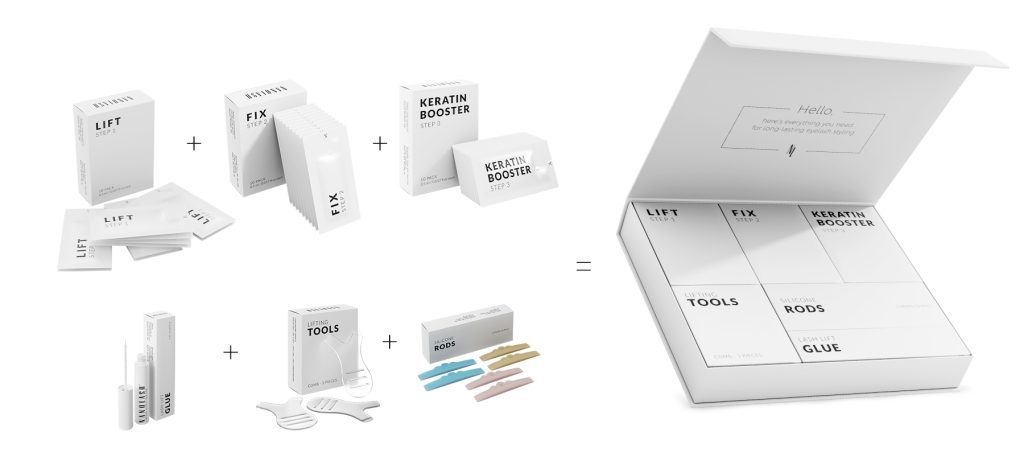
The Nanolash Lash Lift Kit has easily become my top choice for at-home lash lift and lamination. It combines everything you need to create salon-quality, lifted lashes in one convenient kit. When I first tried Nanolash, I was struck by the simplicity of the process and the quality of the ingredients. This kit doesn’t just provide a lash lift; it also includes keratin and botanical oils that provide an extra dose of care and nourishment to my lashes.
Inside, you’ll find all the essentials, including an activator, neutralizer, and a keratin conditioner in single-use sachets. Each sachet contains just the right amount for one treatment, making it easy to control the amount you’re using and eliminating waste. This also means that the kit can last for up to ten applications, which is impressive for its price. There’s also a glue to keep lashes in place on the rods and three pairs of rods and combs for a precise, even curl. The application is straightforward, and the instructions are easy to follow, even if you’re a first-timer.
After using this kit, my lashes looked stunningly curled and shiny, as though I had just left a professional salon. The keratin booster is a standout because it not only enhances the lift but also leaves my lashes soft and healthy. With results lasting up to eight weeks, it’s truly a fantastic investment. The gentle formula is a bonus, especially if you have sensitive eyes like mine. I highly recommend this kit if you want a balanced combination of quality, affordability, and lasting results. It’s ideal for both beginners and experienced users.
2. Thuya Lash Lift Kit
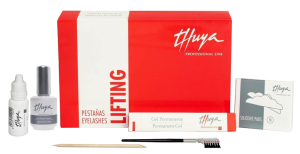
The Thuya Lash Lift Kit is a luxurious option, often used in beauty salons for its high-quality, long-lasting effects. When I tested Thuya, I felt like I was getting a full salon experience, thanks to its rich, nourishing formula that includes keratin to strengthen and protect lashes. This kit goes beyond just curling and lifting; it’s designed to leave your lashes looking fuller, healthier, and shinier after each use.
This kit includes a permanent gel, a neutralizer, and lash lifting glue, along with rods to shape the curl. I found the instructions detailed and straightforward, but this kit does require some precision. The product’s high-quality formula works best when applied with care, so I took my time to ensure every lash was secured to the rod correctly. This attention to detail paid off because the effect was impressive – it looked as though I had received a professional treatment, with every lash beautifully curled.
One of the standout features of Thuya is its ldurabilit The lift and curl held up for nearly eight weeks without losing their shape, which is longer than some of the other kits I’ve tried. While this kit is a bit pricier and can be more challenging to find, the quality justifies the investment. It’s an excellent choice for anyone looking to achieve salon-grade results at home and is especially suitable for experienced users who want a long-lasting, dramatic lift.
3. Elleebana Lash Lift
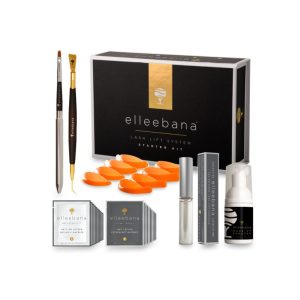
Elleebana is a well-respected brand in the lash industry, and the Elleebana Lash Lift Kit didn’t disappoint. Known for its natural-looking results, Elleebana’s kit is highly favored by professionals and home users alike. The kit includes everything you need for DIY lash lift, and what I love most about it is how effortlessly it creates a beautiful, natural curl that stays in place for weeks.
When using Elleebana, I followed the instructions closely and found the process took about 20 minutes in total. The lifting solution works quickly, and the glue is quite strong, ensuring the lashes stay in place on the silicone rods. I did notice that this kit required a bit more skill and precision, especially with the positioning of the rods and the application of the lifting formula. For anyone new to lash lift and lamination, I’d suggest taking your time with each step to get a seamless result.
The effects lasted between six and eight weeks for me, which was impressive. It’s also very gentle on the eyes, and I didn’t experience any irritation or dryness after using it. Elleebana’s slightly higher price reflects its quality, but the results are worth it if you’re after a kit that delivers a lasting, naturally curled look. This kit would be perfect for someone looking for reliable results and a softer, natural lash enhancement.
4. RefectoCil Eyelash Lift
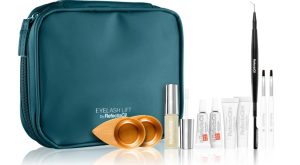
The RefectoCil Eyelash Lift Kit is a fantastic option for anyone looking for a quick but effective lash lift. I was amazed at how fast the application process was – it took only about 13 minutes from start to finish. The speed and ease of use make this kit ideal for anyone with a busy schedule who still wants the benefits of a professional-grade lash lift. Despite the short time needed, the effects were noticeable and lasted for about six weeks.
The kit comes with lifting and neutralizing solutions, adhesive, rods, and additional tools that make the application smooth and efficient. I appreciated that the ingredients are gentle, which was great for my sensitive eyes. This kit doesn’t feel as intense as some of the others, so it’s a good choice if you want a natural, everyday lift that doesn’t look overly dramatic.
One thing I loved about RefectoCil is that the results held up well even with minimal aftercare. My lashes remained curled and defined without any special maintenance. Overall, this kit is a solid option for quick, long-lasting results with minimal fuss. I’d recommend it to anyone who values both speed and effectiveness in a lash lift kit, especially if they’re new to the process and want a user-friendly option.
5. Fleeky Lashlift Kit
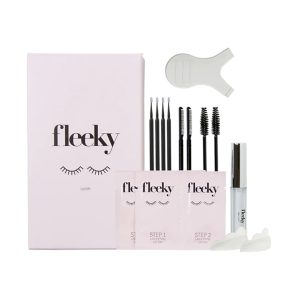
For those new to the world of DIY lash lift and lamination, the Fleeky Lashlift Kit is a wonderful introduction. Designed with simplicity in mind, this kit is incredibly easy to use, making it perfect for beginners who want to try out lash lift at home without any added stress. The kit’s design is minimalistic, containing only the essentials for the lash lift: a lifting lotion, a neutralizing lotion, glue, and silicone rods.
When I tried the Fleeky kit, I noticed it gave my lashes a subtle, soft curl, making it ideal for a natural, everyday look. The process was straightforward, and I didn’t feel overwhelmed by any complicated steps. Each element of the kit was labeled clearly, and the instructions provided were simple to follow, even for a first-timer.
Although the effects weren’t as intense or long-lasting as some of the higher-end kits, the Fleeky Lashlift Kit delivered a gentle lift that lasted about four to five weeks. It’s a great option if you’re looking to enhance your lashes without needing to apply mascara daily. For the price, it’s a fantastic value, and since it’s widely available online, it’s easy to purchase and try out. I’d recommend Fleeky to anyone curious about the DIY lash lift but hesitant to commit to a more expensive or complex kit. It’s affordable, user-friendly, and provides satisfying results for a low-key lash enhancement.
How To Choose the Right Lash Lift Kit?
If you’re looking for the best DIY lash lift kit for home use, Nanolash Lash Lift Kit is my top recommendation for its exceptional ingredients, long-lasting results, and affordable price. Each kit in this ranking, however, brings something unique to the table:
- Thuya for salon-level results and nourishing keratin.
- Elleebana for a reliable, natural effect.
- RefectoCil for quick results with a noticeable curl.
- Fleeky for an easy and budget-friendly starter option.
Investing in the right lash lift kit can transform your beauty routine and let you enjoy gorgeous, curled lashes every day without mascara. So, get ready to elevate your lash game with these top DIY kits!

